Welcome back, in this tutorial we will look at how to submit data back to our web application, this is typically done using forms. We will start by looking at the most basic way to do it, with templates and using ningle controllers, then we will look into using a package called cl-forms. As we do so we will also look into security concerns, specifically cross site request forgery (csrf) and how to implement it.
I made a small contribution to cl-forms as part of this tutorial, as a result the version required for this tutorial may not yet be available in quicklisp so you may want to consider using git to clone it into your quicklisp/local-projects directory.
If you are uncomfortable with, or would like to review how http messages work, please consult this article on mdn, it will be important to understand how forms in html work.
We will concern ourselves with creating the beginnings of an authentication app, our form will allow a user to submit an email address, and their password twice (once to confirm it’s been entered correctly), at the end of this tutorial, you will be able to serve a form and accept the submitted user data back.
We will also consider csrf security tokens, which is a common security practice and it is very important to ensure we take security seriously, even when learning!
Ningle Basic Forms
While we will look into how to use forms in ningle using basic requests, responses, and html here, it is included only as an example, the tutorial project will not use this method, instead using cl-forms.
To begin with, we shall create a html file that will represent our form, in our templates directory, we will create a file called register.html with the following content:
{% extends "base.html" %}
{% block content %}
<h1>Register for an account</h1><formaction="/register"method="POST"><labelfor="username">Username</label><inputtype="email"name="username"id="username"/><labelfor="password1">Password</label><inputtype="password"name="password1"id="password1"/><labelfor="password2">Confirm Password</label><inputtype="password"name="password2"id="password2"/><inputtype="submit"value="Register"/></form>
{% endblock %}
We will immediately write our ningle controllers to render this form and an view to simply print out the data submitted in the form, there’s two ways you can do this, you can handle the GET and POST requests independently, or you can have one controller that does both. I will show both methods, for clarity, with some reasons of why you might pick one over the other, but I will use one controller to handle both GET and POST requests.
You might want to write separate controllers for each method to separate concerns, it may not be obvious from this example, but controllers and processing can get quite complicated, you might want to consider splitting the different logic up. The thing to notice is that there’s a slight change to the line to bind a controller to a route, the :method :GET and :method :POST addition, these are required and the default is :method :GET, but in order to enable other http methods you must include any additional methods.
You may find it cleaner to separate out controllers in this manner, at the expense of writing out some extra boiler plate, personally, I quite like this, but I’m very used to the alternative method of combining both into one. I reserve the right to change my mind later!
The alternative is a little bit less boiler plate, and you can tell ningle to accept multiple http methods with :method '(:GET :POST) (without accepting both it will only take one or the other), the thing we will have to bear in mind is that where previously we could know for certain we only had one type of request and we could write code only to deal with a GET or POST, here we might have to check what the nature of the request is, and conditionally perform some logic. The lack.request package has a method we can use to determine this: (lack.request:request-method ningle:*request*), this will return a string representation of the request method, in our example below “POST”. If we detect a POST request we will print out (using format) the values stored in the request body.
In both examples we have to use this (cdr (assoc "username" params :test #'string=)) (or whatever input field we want) to retrieve the values stored in the form inputs, the params object is used for url information and body parameters.
Using whichever of these methods, you should save, reload, and restart your project access it in your web browser, if you navigate to /register, your form should render. Fill in a username, and the two password fields, when you look at the terminal output, you should see the values printed out.
As impressive as this is, we need to ensure that our application is secure and we must setup “cross site request forgery” (csrf) protection. In a nutshell, this creates a unique string send as a hidden input, and is rendered inside the form, if the application does not receive its csrf token back, it can be assumed that the request has been tampered with and isn’t considered safe and the request should be rejected. It’s a simple, but effective security measure that you absolutely should implement when rendering forms and accepting data from them.
The :session middleware module should be loaded prior to :csrf, this is because the csrf module stores information in the session object, which wont exist if the session isn’t first initialised. The csrf middleware module gives us a function we can call that will give us a hidden html tag we can render in our template, but of course we must pass it into the template, we must edit the controller like so:
On the final line, the render-template* function is edited to be passed a csrfkeyword argument, there’s other functions such as csrf-token, however, the csrf middleware module can be configured to change the name of the token (if that’s what you want to do), and so having the csrf-token isn’t enough, you’d need to know what it’s called internally to send the right name back, rendering the html tag simplifies this.
Finally we will need to update our template to include this tag:
{% extends "base.html" %}
{% block content %}
<h1>Register for an account</h1><formaction="/register"method="POST">
{{ csrf|safe }}
<labelfor="username">Username</label><inputtype="email"name="username"id="username"/><labelfor="password1">Password</label><inputtype="password"name="password1"id="password1"/><labelfor="password2">Confirm Password</label><inputtype="password"name="password2"id="password2"/><inputtype="submit"value="Register"/></form>
{% endblock %}
We must remember to pipe the csrf data though the safe filter so that it is rendered as html and not simply printed to the browser. This will create a hidden input in our form, it should have the name _csrf_token, it is possible to change this, if you wish, by altering the use of :csrf in the lack.builder line.
By changing the csrf middleware setup to a list and adding the :form-tokenkeyword you should be able to see when you restart your project that the hidden input name is now csrf-protection-token.
CL-Forms
Having now seen how forms can be done using just requests, responses, and html, we can look at a package called cl-forms, which will enable us to define what our forms will be in Common Lisp code, it may seem unusual to prepare in the backend what is typically presented by html, however the cl-forms package offers validation and an easier way to retrieve data, as well as handling the csrf for us.
We will be using cl-forms as the default way to handle forms in the tutorial, so while the above section is worth understanding, and may come in helpful under some circumstances, this tutorial will only use cl-forms.
Unlike before where we just started writing html, we need to install and setup cl-forms, it has multiple ways to configure it, and we need to use the ningle backend.
In our project asd file we need to add the following cl-form dependencies:
cl-forms
cl-forms.djula
cl-forms.ningle
The full dependencies section should look like the following:
:depends-on(:clack:ningle:djula:cl-forms;; Add this:cl-forms.djula;; Add this:cl-forms.ningle);; Add this
It is not sufficient to just depend on cl-forms, it has multiple packages, and we want to use the djula template system and the ningle backend, so we must also include these else we may end up using the wrong implementations of some methods. The, cl-forms.djula package, for example, includes some djula tags that we will use in rendering our form and we must ensure these are loaded into our project otherwise we will get errors attempting to render the form.
You might also be tempted to enable the csrf middleware while we are editing this file, however cl-forms has its own implementation of csrf tokens and it conflicts with the ninglecsrf middleware, so we do not need to implement it, in fact it will break things if we do.
As before, we will begin by editing our register.html file, however the content will be much simpler, all we will do is use a tag to render the form in one line.
{% extends "base.html" %}

{% block content %}
    <h1>Register for an account</h1>
    {% form form %}
{% endblock %}
This is a considerable amount of code we now don’t have to write in our frontend templates! The {% form form %} instructs a form object to render its contents using djula (the templating package from the previous tutorial), as mentioned above the form tag is included as part of cl-forms.djula and this is why we had to depend on it.
Instead of declaring all the form fields using html, instead we can write a Lisp class that will be displayed for us, it will also handle the csrf token for us, we do not need to explicitly send it, the cl-forms package will do it for us.
That class will be written to forms.lisp, for now we will just write a basic register form, it will only include an email field, and two password fields (one will be to verify the first).
Declaring a form is very similar to declaring a regular class, as the defformmacro provided by cl-forms creates the accessormethods like defclass does. We do need to provide an action (which is where we want the url to send the form data to), and it’s possible to pass in htmlattributes, but there’s also the :csrf and :csrf-field-namekeyword arguments, these are optional and instruct the form to include a hidden html field, something that we had to do manually using purely html.
Each attribute in the form is laid out similarly to class attributes, however taking the first field as an example (email :email :value "") this sets the form input element to have a name of email (the first item in the list), and it sets the input type to be of email, this is the second argument :email, you can see other form items have :password which maps onto a password input type. The value attribute allows you to set a value on the form input element. It’s worth noting that arbitrary attributes such as id, class etc can’t be set here, but the name, the type and value are all derived from the Common Lisp form attributes.
We can also set up the fields and a submit button in the defform macro, setting up values etc, there’s much more that the defform can do, and I strongly suggest you have a look at the demo, we will explore more uses of defform later in this tutorial series, for now we will just connect up this form to the rest of our application and confirm everything is working first.
With the cl-forms package installed, the form class set up and the html written, there is only one final thing left to do, we need to expand our controller to load the form and send/recieve data.
One thing to remember though, because the form was defined in another file, and indeed in another package, we must either:
Use the package
Import the exported symbols
Explicitly use symbols
I personally choose to import exported symbols, but that’s from a almost 20 years of working with Python!
To achieve this, if you want to just use the form package, in the defpackage section at the top:
(setf(ningle:route*app*"/register":method'(:GET:POST))(lambda(params)(let((form(cl-forms:find-form'register)))(if(string="GET"(lack.request:request-methodningle:*request*))(djula:render-template*"register.html"nil:formform)(handler-case(progn(cl-forms:handle-requestform); Can throw an error if CSRF fails(multiple-value-bind(validerrors)(cl-forms:validate-formform)(whenerrors(formatt"Errors: ~A~%"errors))(whenvalid(cl-forms:with-form-field-values(emailpasswordpassword-verify)form(formatt"Testing: email - ~A, password - ~A, password-verify - ~A~%"emailpasswordpassword-verify)))(djula:render-template*"register.html"nil:formform)))(simple-error(csrf-error)(setf(lack.response:response-statusningle:*response*)403)(djula:render-template*"error.html"nil:errorcsrf-error)))))))
This is quite a lot more code that any of our previous controllers, as discussed in the previous section, on line 1, we must include :method '(:GET :POST) in our routing. This allows the form to be initially rendered in the GEThttp request and data interpreted on the server with POSThttp request.
Within our controller, on line 3 we use cl-forms to load the form with find-form (passing in the symbol that references the form), since we will use this form in a number of places. This will represent both the blank form rendered from the GET request and the populated form submitted in the POST request.
Line 4 is a simple check to determine with type of request we are dealing with, if the string “GET” returned by the lack.request:request-method function then the form will just be rendered with djula. With a simple if used in the code here, you might be interested to know that there are in fact 9 http methods:
If there’s so many, why are we only use a simple if? Because of the :method '(:GET :POST)! With that we explicitly define which methods this controller will accept and we don’t need to worry about the other 7 methods, and as such, a simple if is all we need in this instance.
Using only this if, line 6 begins the else clause of it, here is where things begin to get interesting! We begin with a handler-case, if you have used other languages that take advantage of Exception Handling, it’s analogous to that, and you may want to skip the explaination.
If not, expand this for more details on handler-case!
handler-case is a Common Lisp macro that, in simple terms, allows us to attempt to execute a block of code, on the understanding that it may fail, and if that happens, depending on the nature of the failure, we might want to run some other code to handle the error.
Let's look at a simple example:
(defundiv(ab)(/ab))(div12)
A very simple function here "div" takes an "a" and a "b" and attempts to divide them, everything should work fine for the first call, returning 1/2 (0.5, 50%), however if you call it with the second number being 0, the interpreter signals a DIVISION-BY-ZERO error, which is correct, without wanting to go down a mathematical tangent, computers generally can't divide by zero, so throwing an error is a logical thing to do.
So how can we recover from this situation? We don't want to drop into the debugger and manually handle things every time there's an error! This is what handler-case allows us to do. We start with what we want to do, in this case (/ a b), this is the first form we pass to handler-case, but we also pass in 0 or more "error-clauses".
(defundiv(ab)(handler-case(/ab)(division-by-zero(e)(formatnil"Can't divide by zero"))))(div12)(div10)
We pass in an "error-clause" that captures the condition type, in this case a division-by-zero, "error-clauses" take a condition name (remembering exceptions are a type of condition) and the condition object (which I called "e"), and perform some other code, since the original intended functionality cannot be completed.
When we pass "0" in as the second argument, we now get the string "Can't divide by zero" returned from the function, which is much better, but what if I pass in something that isn't even a number?
(div1"a")
Well, this time I get a new exception signalled, a type-error, which with a small modification:
(defundiv(ab)(handler-case(/ab)(type-error(e)(formatnil"Something isn't a number"))(division-by-zero(e)(formatnil"Can't divide by zero"))))(div12)(div10)(div1"a")
With the new "error-clause" added, this function can now handle some exceptional circumstances!
Something to bear in mind however is that the initial form to handler-case expects a single form, which is why we may have to use a progn to wrap multiple expressions in one form. Of course a let would work just as well, but in my code there's nothing to bind in the let, so a progn would do.
If the csrf token does not match the handle-request function will signal an error condition and the code in the error-clause will run (lines 18-20), the http status code will be set to 403 Forbidden and our error template will be rendered with the error object being passed to the template.
Assuming the csrf token has not been tampered with and no error is signalled, our code will run through lines 7-16, the progn will enclose all of our logic and the handle-request will bind the field values the user entered to the form object, which will then enable us to validate the form.
To validate the form we must call the validate-form function in cl-forms package. According to the documentation it returns the result of a call to values and returns two, a generalized boolean representing if the form is valid or not, and a list of errors. Typically if the form is valid there shouldn’t be any errors and vice versa.
To take advantage of the multiple values returned from validate-form we should use a multiple-value-bind form.
For a recap of values and multiple-value-bind, click here!
    Sometimes you want a function to return multiple values, in some languages (like Python), this basically is returning an implicit tuple that is unpacked, in Common Lisp it is different, and more nuanced. The function values returns a special type of object that, if accessed only returns the first value, however there are other values that may be useful, but perhaps not always.

    A simple example is using the floor division if we try to divide 1 by 2, we end up with 0 and 1 remainder. Therefor (floor 1 2) will give 0, except it doesn't! It actually returns 0, 1, the 0 and the 1 remainder.

    Proving that, however, the 0 is returned by default, we can do the following:

    (+ 4 (floor 1 2))

    Which will give us the value of 4, since the result of (floor 1 2) is a special kind of object that holds multiple values but only gives you the first one, we basically have 4 + 0 here, which is quite correct. You might be wondering then, if we only ever get the first value... how do we get the rest?

    Enter multiple-value-bind!

    multiple-value-bind is a macro that allows us to capture all values and use them.


    (multiple-value-bind (quotient remainer)
        (floor 1 2)
      (format t "Dividing 1 by 2 gives ~A with ~A remaining!~%" quotient remainder))

    Here, with our floor division example from above, we capture the quotient (how many times a number can be wholly divided) and remainder (how much remains that cannot be evenly divided) in the first form that multiple-value-bind takes, the next form must be the expression that returns a values list, it is very important to note that ALL of the returned values are listed in the first form, even if you won't be using them!

    Once this binding has been done, you may have as many expressions as you like inside the multiple-values-bind after the second form, all subsequent expressions are wrapped in an implicity progn.
Using the multiple-value-bind we are able to capture the valid and errors values returned from (cl:forms:validate-form form) call on line 10.
At this point in the tutorial we don’t have any way for a html form to be invalid so errors won’t be captured, however this is something we will come back to, so the line lines 11-12 are there to display any errors we will receive later in this tutorial, although do remember all we are doing with this tutorial is displaying messages in the terminal!
Given there’s no errors to be signalled (yet) the form can be assumed to be valid and we will simply display a string in the terminal with the values the form received on lines 13-15. One thing to note is that similarly to the multiple-value-bind macro, cl-forms provides a with-form-field-values macro that given a list of fields and a form, it will bind the values of the fields of the form and allow you to access the user submitted data.
The fields must be known to the package and is why I was clear earlier about needing to import or use the form package. You could, of course access the members directly, but this is a lot of typing ('ningle-tutorial-project/forms:email instead of email for example). In Common Lisp you are of course free to construct your packages as you see fit, so if another way of arranging your code works for you by all means use that!
Finally, we render the template on line 16, as before!
If we start this application and navigate to /register then we should see the form we have defined in forms.lisp being rendered as expected. If you fill in the form, you should find that if you attempt to put something other than an email into the email field you will get the browser informing you that an email field must contain an email, which is good! This tells us that our form is being rendered as we wanted it to, using the correct html form elements! To continue, if you fill in the form and submit it, looking into the terminal should show us the data you entered, and if so, congratulations!
Now, about those lack of errors… it’s possible to enter pathetic passwords into our form and we should be taking security seriously, we must talk about form validation!
A distinct advantage that using cl-forms over writing your own html forms is that while it is possible to validate the form on the client side (the web browser) if someone were to bypass the client and send data directly to your web server, it could be valid data, but it could also be invalid data (possibly a problem), or even malicious (definitely a problem!), having client side validation is no substitute for validating in the backend. A common adage in computer science “never trust user input”, so we mustn’t. I could attempt to convince you instead I’ll just embed this.
Never trust incoming data.
So, given the password fields allow for weak passwords, what can we do about it?
Clavier is a validation library that cl-forms depends on and we can use to validate the form data. It’s a pretty low level validation library, but since cl-forms is designed to use it, integrating it is rather easy. We already wrote some code in our controller to handle errors, should they occur, so the only thing we need to do is edit our form to put our validation constraints in place. Clavier comes with individual validators and ways to combine them (&& and || for and-ing and or-ing, for example), the library has all the basic building blocks of validation that I could think of wanting.
To integrate it into our form, we must provide a “:constraints” keyword argument, which must be a list of each specific constraint we want to use, and since we are validating our password, we need to use this twice so I chose to store it as a variable.
In this example, I’m going to ensure a password:
Can’t be blank
Is a string
Is at least 8 characters long
We could also add some checks for upper and lower case letters, numbers, and special characters, and there is a regex validator that we can use to achieve that, but that’s an exercise for another tutorial!
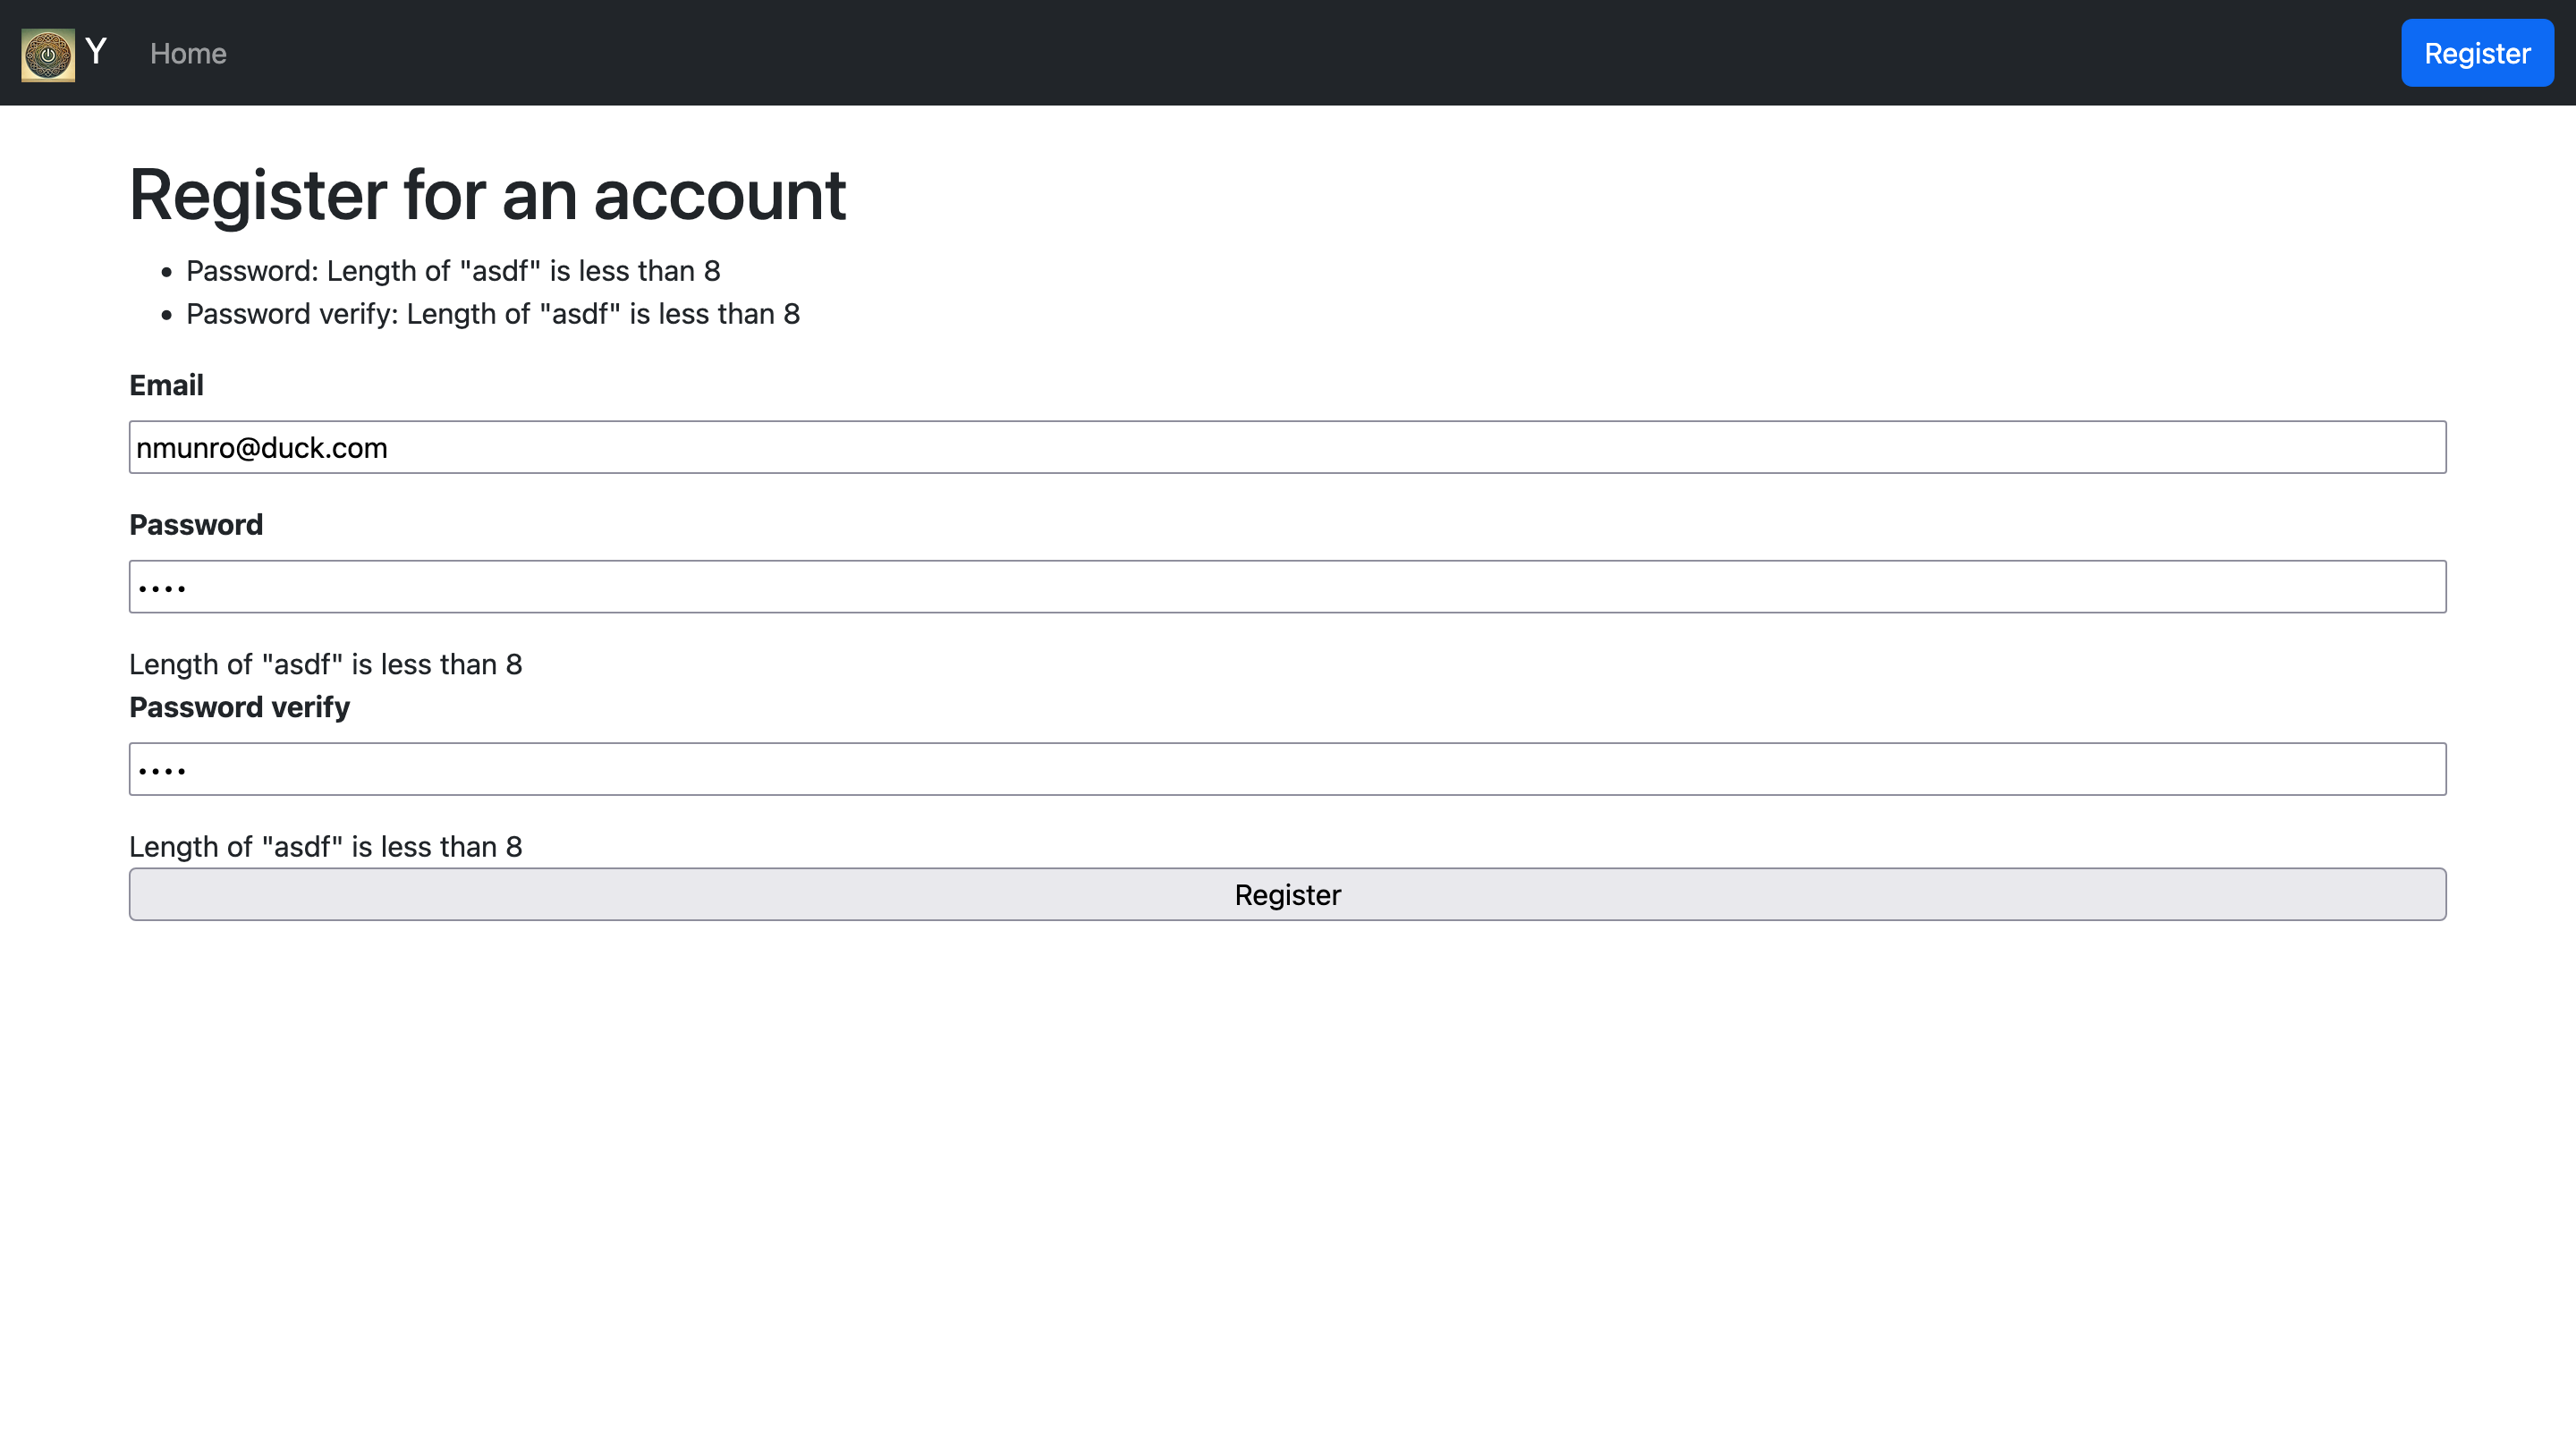
This is the complete listing of the forms.lisp file, as mentioned above, the only real change is creating a list of the validators we might want to use and passing them as the keyword argument. If you save all of this and start the project, you can experiment with submitting the register form with valid data, in which case you will get the information printed in the terminal. Or if you submit the form with invalid data you will see the error printed in the terminal, but you will also have the errors displayed in the web browser as seen below.
You might be wondering, if this screenshot appears automatically for us, why we might also want to log errors, in this small example it doesn’t make much sense, but in production you certainly might want to know if repeated attempts to create user accounts are failing, it could be some sort of cyber attack, or some other malicious actor probing your application and you would certainly want to know about that!
And with that, we come to the end of this tutorial, I hope you have found this helpful and are enjoying this tutorial series.
Conclusion
To recap, after working your way though this tutorial you should be able to:
Use html to render a form
Use cl-forms to render a form
Explain what http messages are, specifically get and post
Explain why cl-forms is a better choice than html
Explain what Cross Site Request Forgery (csrf) tokens are and how they help security
Use csrf tokens to prevent a csrf vulnerability
Handle submitting a form using html
Handle submitting a form using cl-forms
Use clavier to validate a form
Handle errors signalled from clavier
Github
The link for this tutorial code is available here.